The purpose of this lab is to understand how to configure a Cisco ASA firewall from CLI.
For general guidelines how to access this lab environment, look here.
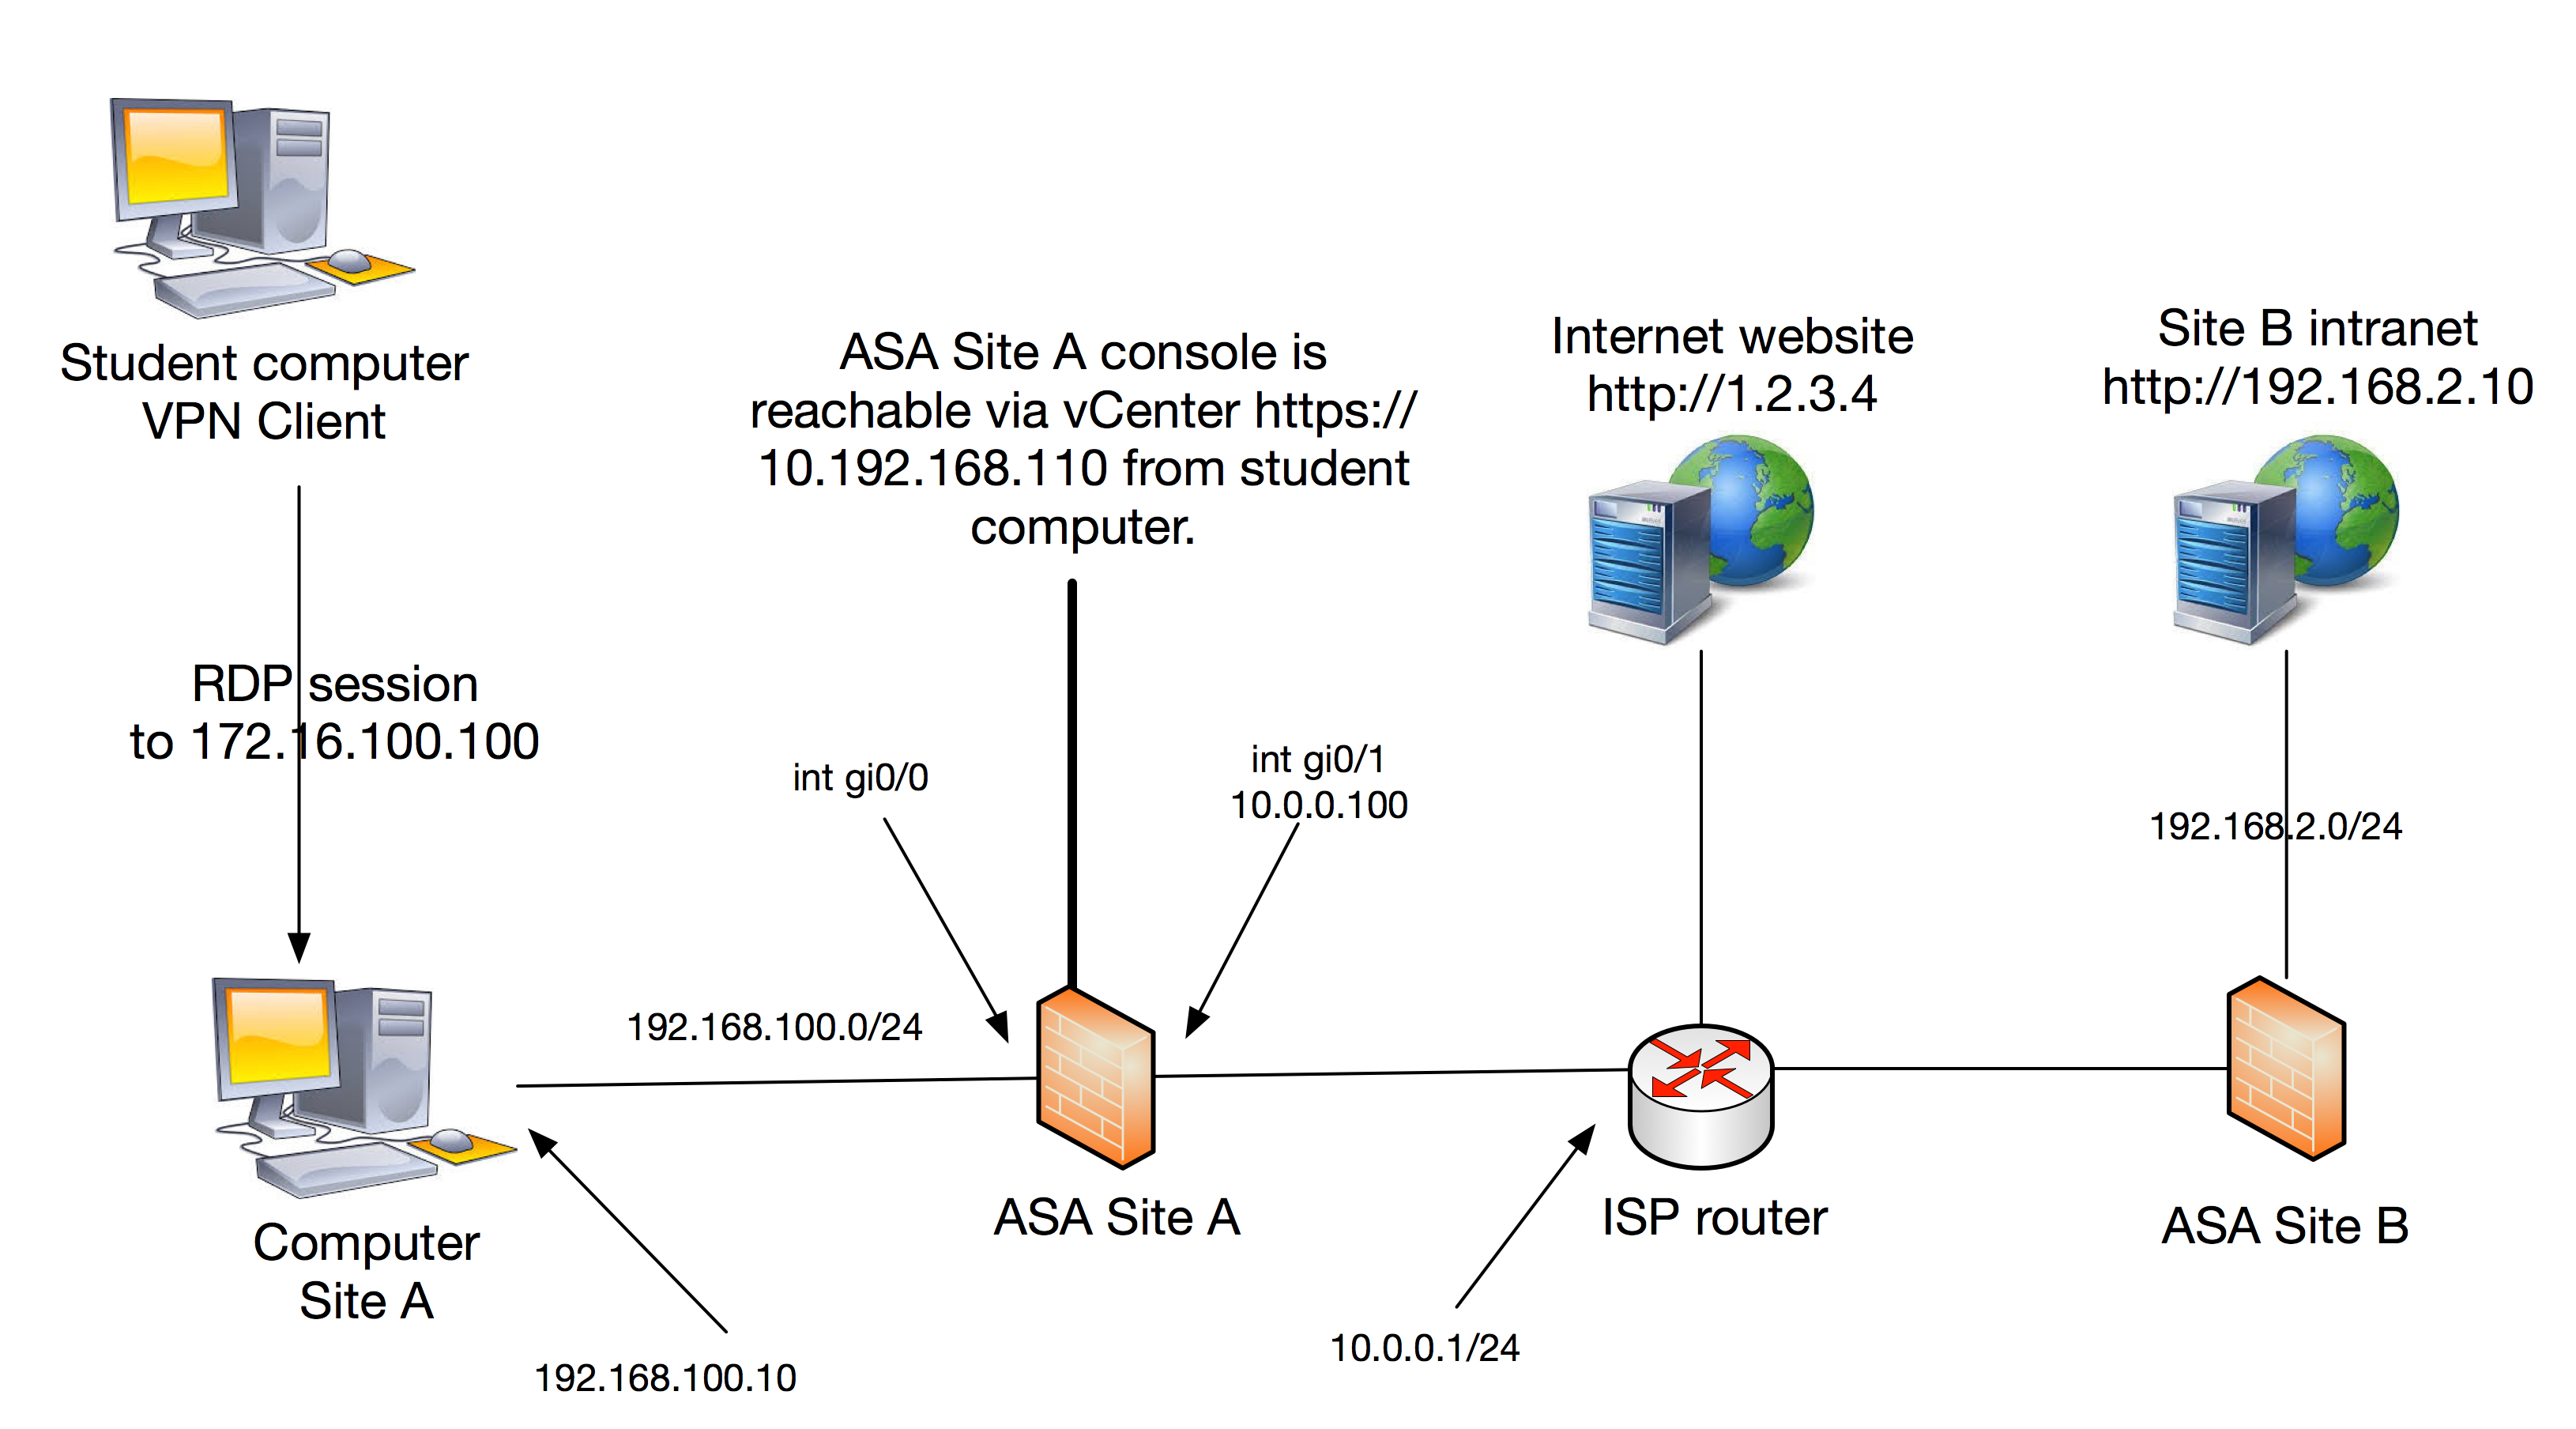
Your task is to configure Site A ASA which has no prior configuration. In the beginning you have to access the console but after setting up IP addressing and remote management you should be able to SSH to the firewall from your management station, the Site A Computer running windows 10.
The firewalls inside address should be 192.168.100.1/24 and the Site A Computer is pre-configured with 192.168.100.10 as address and .1 as default gateway in order to reach the rest of the topology via your Site A ASA.
Outside of your firewall is “internet” represented by an ISP router. Your firewall outside address must be set to ip 10.0.0.100/24 with a default route pointing to 10.0.0.1.
The ISP router does not know about your inside addresses 192.168.100.0/24 (consider these as private). Therefore, all outbound traffic to internet must be dynamically hidden behind the ASA outside interface address.
You have successfully configured the firewall for basic connectivity when you can
- SSH from Site A computer (putty on desktop) to the ASA and login to the CLI.
- browse to the Internet Website from the same computer.
When this is done your next task is to setup a Site2Site IPSec vpn tunnel to Site B. The goal is to reach Site B Intranet from Site A Computer (url link on desktop). Use the following parameters to setup the tunnel:
- Phase 1 parameters: pre-share authentication, aes-256 encryption, sha hashing, DH group 5 and whatever lifetime you want.
- Phase 2 parameters: esp with aes-192 encryption and md5-hmac integrity. Use PFS without DH.
- Peer ip: 10.0.1.2
- Tunnel all traffic between 192.168.100.0/24 and 192.168.2.0/24
- pre shared key: cisco
When done, set the device (ASA Site A) hostname to your name, show that the tunnel is passing traffic in both directions with the “sh crypto ipsec sa” command and take a screenshot showing both your hostname and the major part of the output from the show command.
After you have finished your work, please do “write erase” and “reload” of the Cisco ASA Site A to wipe your configuration.
Good luck!